|
Australian Light Horse
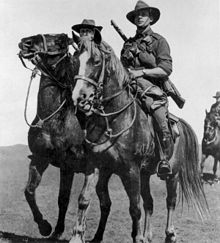 Australian Light Horse were mounted troops with characteristics of both cavalry and mounted infantry, who served in the Second Boer War and World War I. During the inter-war years, a number of regiments were raised as part of Australia's part-time military force. These units were gradually mechanised either before or during World War II, although only a small number undertook operational service during the war. A number of Australian light horse units are still in existence today. OriginsThe Australian Light Horse was established as the outcome of a debate that took place in military circles in Australia in the late 19th – early 20th centuries concerning the future of mounted troops.[1] The example of the Franco-Prussian War illustrated that the battlefield had become dominated by massed land armies supported by artillery. For Australia the reality was vast spaces with sparse populations making it difficult to consider anything that remotely looked like the European model. The 1890s were wracked by drought and depression ensuring that none of the states were able to afford anything but the most token of armies supported by a large contingent of volunteers.[citation needed]  The Second Boer War provided the short term answer. While Australian forces fought against the Boers in South Africa, the Boer methodology of conducting war was considered to be the answer for Australian defence. Volunteer Light Horse Regiments were established around Australia supported by the Rifle Club movement which provided semi trained reinforcements for the various formations. Should these formations be called upon to defend Australia, the local commander was charged with maintaining resistance through the use of the Commando formation which envisaged a large scale guerrilla war. The prospect of an endless and strength-sapping guerrilla war was the key deterrent factor which relied heavily upon mobile soldiers. The mounted infantry remained the key to the Australian defence posture until the Kitchener Report of 1910 (Archived 17 June 2008 at the Wayback Machine) which envisaged formations that could be slotted directly into an Imperial expeditionary force. The plan envisaged two mounted divisions.[citation needed] By the outbreak of World War I, there were 23 light horse regiments within Australia's part-time military force, consisting of 9,000 personnel.[1] These were organised as follows:[2][3]
World War IFormation and organisation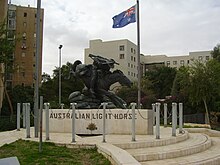 Light horse were like mounted infantry in that they usually fought dismounted, using their horses as transport to the battlefield and as a means of swift disengagement when retreating or retiring. A famous exception to this rule though was the charge of the 4th and 12th Light Horse Regiments at Beersheba on 31 October 1917. In 1918, some light horse regiments were equipped with sabres,[4] enabling them to fight in a conventional cavalry role in the advance on Damascus. However, unlike mounted infantry, the light horse also performed certain cavalry roles, such as scouting and screening, while mounted.[4] 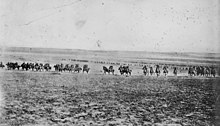 The light horse were organised along cavalry rather than infantry lines. A light horse regiment, although technically equivalent to an infantry battalion in terms of command level, contained only 25 officers and 400 men as opposed to an infantry battalion that consisted of around 1,000 men. Around a quarter of this nominal strength (or one man in each section of four) could be allotted to horse-holding duties when the regiment entered combat.[5][4] A regiment was divided into three squadrons, designated "A", "B" and "C" (equivalent to a company), and a squadron divided into four troops (equivalent to but smaller than a platoon). Each troop was divided into about 10 four-man sections. When dismounting for combat, one man from each section would take the reins of the other three men's horses and lead them out of the firing line where he would remain until called upon.[4] Each regiment initially had a troop of two Maxim guns but during the Gallipoli Campaign, where the light horse served dismounted, this was increased to four guns. In 1916, following the establishment of the Australian Machine Gun Corps, these were consolidated into four light horse machine gun squadrons, each with 12 Vickers machine guns, allocated at brigade level within the 1st, 2nd, 3rd and 4th Light Horse Brigades.[6] In turn, the troops received the Lewis Gun.[7] This was replaced by the Hotchkiss M1909 Benét–Mercié machine gun in April 1917. Eventually they arrived in such numbers as to allow each troop to have a Hotchkiss gun, which considerably added to the mobile firepower of a regiment.[8] 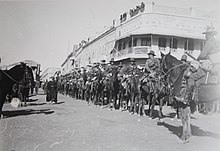 The Australian Waler horse was the common mount for the light horsemen, as it was strong and hardy, which was needed in the harsh desert climate. This was facilitated by the horses being left behind in Egypt while the light horsemen went to Gallipoli, allowing them to gradually acclimatise.[9]  Although the authorities did not welcome Indigenous men into the Australian Armed Forces, nonetheless some managed to enlist in the Australian Light Horse. Unlike in civilian life, where Indigenous men received a lower rate of pay, in the Army there was only one rate of pay. This may have been a motivation for their enlistment, in addition to other considerations, including patriotism.[11] Several served during the Gallipoli campaign. Skilled in working with horses, and in hot climates, they were valued members of the Light Horse.[12] Gallipoli and the Sinai and Palestine campaign At the start of World War I, Australia committed to provide an all volunteer expeditionary force of 20,000 personnel known as the Australian Imperial Force, which would consist of an infantry division and a light horse brigade.[13] As Australia's commitment to the war increased, the size of the light horse contingent was expanded, with a second and third light horse brigade being raised in late 1914 and early 1915.[14] Eventually, the Australian Light Horse regiments were organised into five brigades:[15]
The light horse regiments' first involvement in the fighting during the war came during the Gallipoli Campaign, where the troops of the 1st, 2nd and 3rd Light Horse Brigades were sent to Gallipoli without their horses to provide reinforcements for the infantry.[16] During the campaign they were used mainly in a defensive role, although the light horsemen did participate in several costly battles, such as the Battle of the Nek.[17] After the evacuation of the Gallipoli peninsula in December 1915, the light horse regiments that had been deployed were re-constituted in Egypt and in March 1916, the Australian mounted troops of the 1st, 2nd and 3rd Light Horse Brigades and the New Zealand Mounted Rifles Brigade were placed together in the ANZAC Mounted Division.[18]  Elements of the light horse brigades also undertook a campaign against the Senussi in the western desert region of Egypt with actions commencing in late 1915 and continuing through until 1917.[19][20] These actions were largely limited though, and were overshadowed by the Light Horse's involvement in the fighting against Ottoman forces in the Sinai and Palestine Campaign from 1916 to 1918.[21] A reorganisation of the mounted troops was ordered in February 1917 leading to the formation of the Anzac Mounted Division consisting of the 1st and 2nd Light Horse Brigades, the New Zealand Mounted Rifles Brigade, and the British 22nd Mounted Brigade. Meanwhile, the Imperial Mounted Division was formed from the 3rd and 4th Light Horse Brigades and the British Yeomanry 5th and 6th Mounted Brigades. The Imperial Mounted Division's name was soon changed to the Australian Mounted Division at the request of the Australian government. The arrival of more yeomanry from Salonika prompted the raising of the Yeomanry Mounted Division (6th, 8th and 22nd Yeomanry Brigades) in June 1917.[22] The three mounted divisions and the Imperial Camel Brigade formed the Desert Mounted Corps under the command of Lieutenant General Harry Chauvel. With the removal of most of the Yeomanry to France and the breakup of the Imperial Camel Corps, the newly formed 5th Light Horse Brigade took its place with the Australian Mounted Division. Two Indian cavalry divisions replaced the Yeomanry Division in the Desert Mounted Corps.[23] Care of horses in the Sinai campaignIn 1916, the average loss of sick horses and mules from the Sinai front was approximately 640 per week. They were transported in train loads of thirty trucks, each holding eight horses. Animals which died or were destroyed while on active service were buried 2 miles (3.2 km) from the nearest camp unless this was not practicable. In this case the carcasses were transported to a suitable site away from troops, where they were disemboweled and left to disintegrate in the dry desert air and high temperatures. Animals which died or were destroyed in veterinary units at Kantara, Ismalia, Bilbeis, and Quesna were dealt with in this way and after four days' drying in the sun, the carcasses were stuffed with straw and burnt, after the skins were salved. These were sold to local contractors.[24] Western FrontThe 13th Light Horse Regiment and one squadron of the 4th Light Horse Regiment served on the Western Front, first as divisional cavalry squadrons for the 2nd, 4th and 5th Divisions, then as the I ANZAC Corps Mounted Regiment. A squadron of the 4th provided the divisional cavalry squadron for the 1st Division, and one of the 14th Light Horse Regiment for the 3rd Division. (This squadron was eventually disbanded.) The original B and D squadrons of the 4th, in combination with New Zealand mounted troops, became part of the II ANZAC Corps Mounted Regiment. After II Anzac Corps was disbanded, the regiment joined 22nd British Corps re-designated as XXII Anzac Mounted Regiment. After the Australian Corps was formed in November 1917, the I Anzac Corps Mounted Regiment became known as the 13th Light Horse Regiment again. The Australian squadrons of XXII Regiment were amalgamated with the 13th Australian Light Horse Regiment. For a month in 1918 during the battles of Hundred Days Offensive, the 13th was attached to the III British Corps, while Sir Alexander Godley briefly commanded III Corps and regarded the regiment as his personal troops.[15][25][26] Post World War I After the war, the light horse regiments were distributed as follows:[27]
These cavalry brigades were organised into two cavalry divisions: the 1st and 2nd.[17] At the outbreak of World War II, there were 25 light horse regiments. Of these, 17 were still horsed although they had been partially mechanised, while four had been converted to machine gun regiments and two had been converted to armoured car regiments.[28] Throughout the war, the various light horse units were converted to motorised infantry, armoured car or armoured regiments, serving mainly in the defence of Australia. As the threat of invasion passed, though, most were disbanded in 1943 or 1944 and their personnel redistributed amongst other units. By 1945, only two units remained. The first of these was the 20th Light Horse Regiment, which as the 20th Motor Regiment, served overseas, at Merauke, and was later converted into a pioneer regiment. The second unit was the 1st Light Horse Regiment, which became the 1st Tank Battalion, and as such fought in New Guinea and Borneo.[28] Legacy

Popular cultureLiterature
FilmSeveral films include the charge at Beersheba in 1917:
See also
ReferencesCitations
Bibliography
Further reading
External linksWikimedia Commons has media related to Australian Light Horse. |
Portal di Ensiklopedia Dunia