|
5th Searchlight Brigade (United Kingdom)
The 5th Anti-Aircraft Brigade (5 AA Bde) was an air defence formation of the British Army during the Second World War. It was formed as a searchlight brigade to protect the British Expeditionary Force's bases just before the Battle of France. After the Dunkirk evacuation it was reformed as a conventional anti-aircraft (AA) brigade and served through the rest of the war in Anti-Aircraft Command, defending various parts of the United Kingdom against bombing raids and V-1 flying bombs. It continued to serve in the Regular Army during the early postwar years. OriginAs the British Expeditionary Force (BEF) in France expanded during the Phoney War period, new headquarters (HQs) were formed to control the various groups of AA guns and searchlights (S/Ls) of the Royal Artillery (RA) and Royal Engineers (RE) that were deployed to defend its field formations and base installations. 5th AA Brigade HQ was formed at Blackdown on 2 February, redesignated 5th Searchlight Brigade on 6 April, and sent to France shortly before the Battle of France began on 10 May.[1] Its commander was Brigadier Edmund Rait-Kerr, RE, who had been commandant of the Army's School of Electric Lighting at Gosport.[2][3] Coming directly under General Headquarters (GHQ) the brigade's role was to administer the S/L units deployed to protect airfields, ports, and the BEF's forward gun areas.[4][5] Order of Battle May 1940 At the beginning of the Battle of France the brigade had the following composition:[6][4][7][8][9]
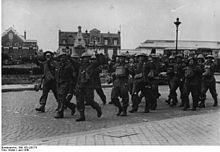
Battle of FranceWhen the Battle of France began on 10 May, the BEF started its planned advance north into Belgium (Plan D), but the German Army broke through the Ardennes to the east, forcing the BEF to withdraw again. 1st and 3rd Searchlight Batteries were ordered to hold the bridges on the La Bassée–Béthune Canal 'at all costs' against attacks from the south. They deployed their Boys anti-tank rifles and Bren guns, using S/L lorries as roadblocks, while French forces withdrew through them. The towns were bombed and S/L positions were machine-gunned by Luftwaffe fighters. 4th Searchlight Bty, deployed round Lille, saw constant enemy air activity. On 17 May it detached a group of riflemen with Boys rifles to defend 5 AA Bde HQ at Lens while the remainder joined the Bethune canal guards. On that day 1st S/L Bty was ordered back to Calais, a move made difficult because all the roads were choked with refugees. There it operated in the S/L role to defend the port.[11][14][15][16] Meanwhile, Army Group A had cut the BEF's lines of communication into France and driven it back towards the coast at Dunkirk, cutting off the British troops at Calais and Boulogne from the main force. When planning the evacuation from Dunkirk (Operation Dynamo), the BEF's commanders decided that Calais and Boulogne should still be held as supply points for further fighting or possible exit points for a final withdrawal.[17] Calais By 20 May, 1st and 2nd S/L Btys of 1st S/L Rgt, with part of 2nd S/L Rgt, were deployed as a screen of S/L detachments one mile apart round the east side of Calais and Lt-Col Goldney of 1st S/L Rgt was appointed AA Defence Commander for the town. They were joined on 22 May by 30th Infantry Brigade, just before advanced German troops began probing the defences, beginning the Siege of Calais. On the night of 22/23 May the AA units engaged Luftwaffe raiders that bombed Calais, starting fires. But ground attack was now the biggest danger, and the S/L men had to man the perimeter as infantry, a role for which they (mainly older Territorials, raw militiamen and a few ex-RE reservists) were untrained. Nevertheless, they put up a stout fight, halting tank columns for several hours before they were overwhelmed. The remnants were forced back to the citadel and harbour, where some were evacuated by sea but most became Prisoners of war (PoWs) when the citadel fell on 26 May. The town's three-day defence, holding up Heinz Guderian's XIX Panzerkorps, had provided some respite for the Dunkirk evacuation.[9][18][19][20][21][22] Hondeghem2nd Searchlight Rgt was more widely spread. While part went to Calais, a Troop of one officer and 80 men found themselves attached to K Battery, Royal Horse Artillery, with orders to help hold the small village of Hondeghem which was on the main German axis of advance. The gunners fought a valiant action on 26 May then, running short of ammunition, they charged the German positions and broke through, giving them a route out towards Dunkirk. By now, 2nd S/L Rgt had 5 Bty completely missing, 6 Bty had over 50 per cent missing and 8 Bty was missing just under a quarter. By the time the evacuation was complete, the Regiment had lost over 50 men killed and approximately half the regiment captured.[9][23][24][25] Dunkirk3rd (Ulster) Searchlight Rgt fared much better. Its batteries were deployed relatively close together around the Dunkirk perimeter with 12 Bty in the town itself. On 19 May, after some hard fighting often against tanks, the bulk of the regiment was ordered to destroy their searchlights and make for Dunkirk. By 21 May, 9, 10 and 11 Btys were in defensive positions around the port while 12 Bty continued in its S/L role inside the town. Over the next six days the regiment withstood many attacks from the enemy. Once the decision had been made on 24 May to evacuate, the HQs of 2 AA Bde and 5 AA Bde bore the brunt of AA defence of Dunkirk and the beaches, taking over those remnants of AA units that made their way back to the port. On 27 May 3rd S/L Rgt was relieved; RHQ and 9, 10 and 11 Btys were evacuated to England the next day. Two Troops of 12 Battery were evacuated in small boats the following day, while the rest of the battery was ordered to destroy the remaining lights and assist in the defence of the beaches. They were eventually taken off the beach in small batches by 31 May. 3 (Ulster) S/L Rgt had been very lucky with only 28 killed, 41 wounded and three men taken prisoner.[9][20][23][26] Home defenceOrders were issued on 13 July for the brigade to be reformed (as 5th AA Brigade) in the Gloucester area within 5 AA Division of AA Command. It became a mixed AA formation containing heavy (HAA) and light (LAA) gun units as well as S/L units. The Gloster Aircraft Company factory at Brockworth, Gloucestershire, was a strategic target in the area and was protected by 24 HAA guns.[27][28] Order of Battle July 1940By about 18 July the reformed HQ had taken over the following units:[27]
Blitz In November 1940, as the Luftwaffe's night bombing campaign against British cities (The Blitz) was getting under way, there was a major reorganisation of AA Command. 5 AA Division's responsibilities were split, with 9 AA Division created to cover the South Midlands and South Wales. 5 AA Brigade came under this new formation, with responsibility for covering Gloucester and Hereford.[36][37][38][39] There were few air raids in 5 AA Bde's area, although the Gloster works at Brockworth and Hucclecote were targeted. Otherwise, enemy air activity was reported as 'slight' and 'small scale', and was mainly heading towards Birmingham and Coventry in the neighbouring 11 AA Division area, with one raid on Cheltenham on 11 December.[40][41][42] From November 1940 searchlights were deployed in clusters of three lights in an attempt to improve the chances of picking up enemy bombers and keeping them illuminated for engagement by AA guns or Royal Air Force (RAF) night-fighters. Eventually, one light in each cluster was to be equipped with Searchlight Control (SLC) radar and act as 'master light', but the radar equipment was still in short supply.[43] Order of Battle 1940–41 During the Blitz, which ended in May 1941, the composition of 5 AA Bde was as follows:[36][38][44][45]
Mid-WarIn the summer of 1941, AA Command began to receive purpose-built SLC radar in sufficient numbers to allow some S/Ls to be 'declustered' into single-light sites. These were redeployed into 'Indicator Belts' of radar-controlled S/L clusters covering approaches to the night-fighter sectors, repeated by similar belts covering AA Command's Gun Defence Areas (GDAs). Inside each belt was a 20-mile deep 'Killer Belt' of single S/Ls spaced at 6,000 yards (5,500 m) intervals in a 'Killer Belt' cooperating with night-fighters patrolling defined 'boxes'. The pattern was designed to ensure that raids penetrating deeply towards the Midlands GDAs would cross more than one belt, and the GDAs had more S/Ls at close spacing. The number of LAA units to protect Vital Points (VPs) such as aircraft factories and airfields was growing, albeit slowly. At this stage of the war, experienced units were being posted away to train for service overseas, which led to a continual turnover of units. However, newly formed units continued to join AA Command, the HAA and support units increasingly becoming 'Mixed' units, indicating that women of the Auxiliary Territorial Service (ATS) were fully integrated into them.[39][46][47] In December 1941 Lt-Col R.C.M. Raikes was promoted from 79th (Hertfordshire Yeomanry) HAA Rgt to command 5 AA Bde.[48][a] Order of Battle 1941–42 During this period 5 AA Bde was composed as follows:[50]
Hit and run The AA defences of Southern England were severely tested from March 1942 by the Luftwaffe's 'hit-and-run' attacks against towns along the South Coast, and there was a pressing need for more LAA guns to be deployed in that area. In June 1942, 5 AA Bde HQ was transferred to reinforce 5 AA Division defending the South Coast.[39][46][60][61] (Unlike most of AA Command's Territorial Army brigades, which retained their strong regional identities, 5 AA Bde was regularly relocated and/or resubordinated as required.) In October 1942 AA Command abolished its hierarchy of divisions and corps, and established a single tier of AA Groups corresponding to the Groups of RAF Fighter Command. 5 AA Brigade came under 2 AA Group covering South East England (outside London) and affiliated to No. 11 Group RAF.[39][62][63] The turnover of units accelerated with the need to provide AA cover for the Allied invasion of North Africa (Operation Torch) in late 1942 followed by the landings in Sicily and Italy in 1943. 21st Army Group was established in early 1943 to begin preparing for the Normandy Landings (Operation Overlord). As the threat from the Luftwaffe waned, AA Command was forced to release men for other duties, and a number of searchlight units were disbanded or converted, and some batteries were disbanded.[64] Order of Battle, 1942–43Within 5 AA Division/2 AA Gp, the brigade had a completely new and rapidly changing order of battle (temporary attachments omitted):[61][63][65]
After the constant turnover, 5 AA Bde was reduced to just two operational units by August 1943: 179th (M) HAA Rgt and 130th (Queen's Edinburgh, Royal Scots) LAA Rgt.[82] Order of Battle 1943–44After August 1943, 5 AA Bde's composition was as follows:[82]
Operation Overlord 2 AA Group was responsible for defending the assembly camps, depots and embarkation ports for Operation Overlord. In November 1943 it was also ordered to plan for the expected onslaught of V-1 flying bombs (codenamed 'Divers') against London, to which it responded by planning a thick belt of 8-gun HAA positions across the likely flight path, backed by LAA guns. Meanwhile, the Group also had to deal with a sharp increase in Luftwaffe air raids trying to reach London during the winter of 1943–4 (the so-called 'Little Blitz'). AA Command relieved the burden on 2 AA Group by bringing down 6 AA Group HQ from Scotland and giving it responsibility for the Overlord ports in the Solent–Portsmouth area. 5 AA Brigade, together with 134th (M) HAA Rgt, 19th LAA Rgt and its GORs, transferred to the command of 6 AA Group in March 1944.[39][83][84] Order of Battle March–August 1944During this period 5 AA Bde's composition was as follows:[82][84]
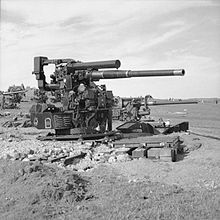
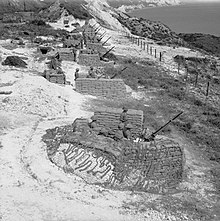
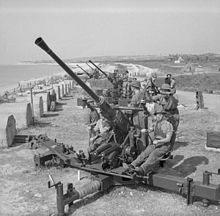
Operation Diver The first V-1 missiles were fired against London in June, a week after D-Day, and Operation Diver was activated. 2 AA Group's HAA batteries left their 'Overlord' sites and moved to pre-planned sites across the 'funnel' of V-1 flightpaths. 5 AA Brigade was one of four reinforcing brigade HQs moved into the Group within two weeks, taking over units deployed in the area. However, the results were disappointing, and after a fortnight AA Command changed its tactics. Firstly, mobile HAA guns were replaced with static installations that could traverse more quickly to track the fast-moving targets. These were emplaced on temporary 'Pile platforms' named after the Command-in-Chief of AA Command, Gen Sir Frederick 'Tim' Pile. Secondly, the HAA gun belt was moved to the coast and interlaced with LAA guns to hit the missiles out to sea. This new belt was divided into six brigade sectors, with 5 AA Bde HQ taking charge of one sector under 1 AA Gp. The whole process involved the movement of hundreds of guns and vehicles and thousands of servicemen and women, but a new 8-gun site could be established in 48 hours. The guns were constantly in action, but the success rate against the 'Divers' steadily improved, until over 50 per cent of incoming missiles were destroyed by gunfire or fighter aircraft. This phase of Operation Diver ended in September after the V-1 launch sites in Northern France had been overrun by 21st Army Group.[39][85][86][87]  Order of Battle August 1944When it rejoined 2 AA Gp, 5 AA Bde's composition was as follows:[84]
Order of Battle September–November 1944 After it redeployed under 1 AA Gp in September, 5 AA Bde's composition was as follows:[84]

By October 1944, 5 AA Bde's HQ establishment was 11 officers, 9 male other ranks and 28 members of the ATS, together with a small number of attached drivers, cooks and mess orderlies (male and female). In addition, the brigade's Mixed Signal Office Section comprised 5 male other ranks and 19 ATS.[88] Winter 1944–45A new phase of Operation Diver began when the Luftwaffe began launching V-1s from aircraft over the North Sea. AA Command had to reorganise its defences, stripping HAA guns from inland sites and moving them to the coast of East Anglia, together with Pile platforms and accommodation huts. In November 1944 a new 9 AA Gp was formed to take over the 'Diver' defences in East Anglia and 5 AA Bde was transferred to this new formation.[39][89] By the end of 1944, 21st Army Group was suffering a severe manpower shortage, particularly among the infantry.[90] At the same time the Luftwaffe was suffering from such shortages of pilots, aircraft and fuel that serious aerial attacks on the United Kingdom could be discounted. In January 1945 the War Office began to reorganise surplus anti-aircraft regiments in the UK into infantry battalions, primarily for line of communication and occupation duties in North West Europe, thereby releasing trained infantry for frontline service.[91] Order of Battle November 1944–May 1945 After 5 AA Bde was transferred to 9 AA Gp it had the following composition:[84]
PostwarAfter Victory in Europe, AA Command was rapidly run down. 9 AA Gp was disbanded and 5 AA Bde reverted to the command of 2 AA Gp, with 127th and 140th HAA Rgts, 14th and 19th LAA Rgts under command.[84] By November 1945, 5 AA Bde comprised just 140th and 150th HAA Rgts.[92] When AA Command was reorganised in 1947 it had some Regular units under its control in addition to its largely Territorial make-up. These included some under 5 AA Bde based at Aldershot under 2 AA Gp, which covered Southern and South-Western England. These units were all disbanded by the late 1950s.[93][94][95]
5 AA Brigade was converted into 5 Army Group Royal Artillery (AA) in British Army of the Rhine on 1 November 1950, replacing a disbanded formation. It was placed in suspended animation on 31 March 1958 and formally disbanded on 1 January 1962.[1][99] FootnotesNotes
References
External sources |
||||||||||||||||
Portal di Ensiklopedia Dunia